
ditra heat thermostat installation manual
This manual guides you through installing the Ditra Heat thermostat, essential for optimizing your underfloor heating system․ Designed for professionals and DIYers, it ensures efficient and safe operation, covering key steps and best practices for a successful setup․
Purpose of the Manual
This manual provides a comprehensive guide for installing the Ditra Heat thermostat, ensuring a seamless integration with your underfloor heating system․ It is designed to assist both professionals and DIY enthusiasts in understanding the installation process, from preparation to final setup․ The manual covers essential steps, troubleshooting tips, and maintenance recommendations to guarantee optimal performance and safety․ By following the instructions outlined, users can confidently install and configure their Ditra Heat thermostat, leveraging its smart features for efficient temperature control․ This guide also serves as a reference for resolving common issues and maximizing the system’s longevity and energy efficiency․ Whether you’re a seasoned installer or a homeowner, this manual offers clear, step-by-step instructions to achieve a successful installation․
Key Features of the Ditra Heat Thermostat
The Ditra Heat thermostat is designed to optimize underfloor heating systems with advanced features for precise temperature control․ It includes WiFi connectivity for smart home integration, allowing remote monitoring and adjustments via mobile apps․ The thermostat supports programmable scheduling, enabling users to set customized temperature preferences for energy efficiency․ It also features a touchscreen interface for intuitive operation and seamless integration with Ditra Heat components․ The system includes a floor temperature sensor for accurate readings and optimal performance․ Additionally, it is compatible with Ditra Heat power modules, such as the Ditra Heat-E-RR, ensuring reliable operation․ These features make the Ditra Heat thermostat a versatile and user-friendly solution for modern heating needs․
Pre-Installation Requirements
Before starting, ensure electrical compatibility, gather tools, and follow safety guidelines․ Read the manual and understand components to properly prepare for a successful Ditra Heat thermostat installation․
Gathering Necessary Tools and Materials
To ensure a smooth installation process, gather all required tools and materials in advance․ Essential tools include a multimeter, drill, screwdrivers, cable ties, and a thermostat wiring kit․ Materials needed are the Ditra Heat thermostat, Ditra Heat power module (e․g․, DITRA-HEAT-E-RR), floor temperature sensor, thermostat sensor wire, and appropriate wiring connectors․ Additionally, ensure you have a WiFi adapter for smart features and any necessary adapters for electrical connections․ Always verify compatibility with your system and consult the manual for specific requirements․ Proper preparation ensures safety and efficiency during installation, avoiding delays or potential errors․ Make sure all components are compatible with your electrical setup and flooring system for optimal performance․ Double-check the list to confirm nothing is missing before starting the installation process․ This step is critical for a successful and trouble-free setup․
Understanding the Ditra Heat System Components
The Ditra Heat system consists of several key components designed to work together seamlessly for efficient underfloor heating․ The thermostat is the central control unit, regulating temperature and integrating with the system’s smart features․ The heating cables are embedded within the Ditra mat, a specialized underlayment that protects the heating elements and distributes heat evenly․ The power module (e․g․, DITRA-HEAT-E-RR) serves as the energy source, connecting to the heating cables and thermostat․ Additionally, the floor temperature sensor monitors the floor temperature, ensuring optimal performance and safety․ Understanding these components and their roles is crucial for proper installation and system functionality․ Each part is designed to work in harmony, providing reliable and efficient heating․ Familiarizing yourself with these components will help you navigate the installation process confidently․ Proper integration ensures maximum efficiency and safety․
Designing the Heating System
Designing the Ditra Heat system involves calculating heat loss, planning the layout, and considering space and insulation requirements to ensure efficient and even heat distribution across the floor area․
Calculating Heat Loss and Heating Requirements
Calculating heat loss is crucial for determining the required heating capacity․ Factors such as room dimensions, insulation levels, window size, and climate zone influence heat loss․ Use a heat loss calculator or consult local building codes to estimate BTU requirements․ Properly assessing these factors ensures the Ditra Heat system operates efficiently․ Additionally, consider the layout of the heating system to avoid obstructions and ensure even heat distribution․ This step is vital for achieving optimal performance and comfort․ Always refer to the installation manual for specific guidelines and formulas to calculate heating requirements accurately․ Incorrect calculations may lead to insufficient heating or increased energy costs․ Ensure all variables are accounted for to design an effective system․
Planning the Layout of the Heating System
Planning the layout of the heating system ensures efficient heat distribution and avoids installation issues․ Begin by assessing the room’s dimensions, shape, and heat sources (e․g․, radiators or baseboards)․ Mark the locations of furniture, fixtures, and obstructions to determine the best path for the heating cable․ The Ditra Heat system requires careful consideration of spacing between heating cables and proximity to the thermostat․ Position sensors away from direct heat sources to ensure accurate temperature readings․ Plan the layout to minimize cable waste and ensure even heat coverage․ Use a sketch or digital tool to visualize the system before installation․ Proper planning ensures the system operates efficiently and meets the space’s heating needs․ Always refer to the installation manual for spacing and layout recommendations specific to your setup․

Installation of Ditra Heat Mat
Ensure the subfloor is clean, dry, and level before laying the Ditra Heat Mat․ Secure it firmly to prevent movement and ensure proper adhesion for even heat distribution․
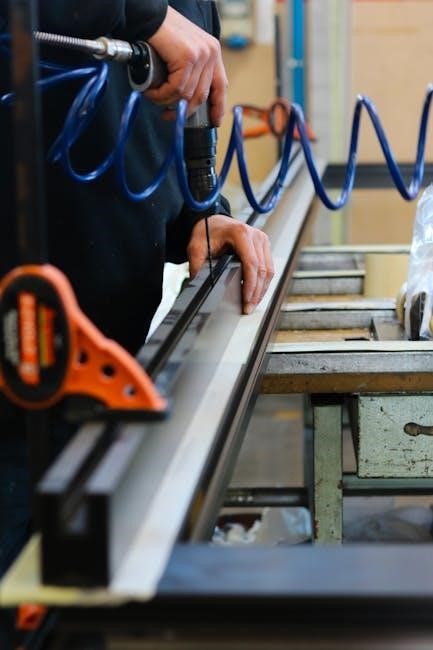
Preparing the Subfloor for Ditra Mat Installation
Before installing the Ditra Heat Mat, the subfloor must be thoroughly prepared to ensure proper adhesion and functionality․ Start by cleaning the surface, removing any debris, old adhesives, or contaminants that could interfere with the mat’s bonding․ Check for cracks or uneven areas and fill them with a suitable patching compound․ Allow the compound to dry completely as per the manufacturer’s instructions․ Ensure the subfloor is level and dry, as moisture can compromise the installation․ For concrete floors, ensure they are cured and free of efflorescence․ Wooden subfloors should be securely fastened and free of movement․ Once the subfloor is clean, dry, and even, you are ready to lay the Ditra Heat Mat․ Proper preparation is crucial for optimal system performance and longevity․
Laying and Securing the Ditra Mat
Begin by unrolling the Ditra Heat Mat in the installation area, starting from one corner and working your way outward․ Cut the mat to size using a utility knife, ensuring it fits neatly within the designated space․ Peel the backing from the mat and press it firmly onto the prepared subfloor, aligning it with the heating cable layout․ Secure the mat with screws or fasteners provided, ensuring they are spaced evenly and do not puncture the heating elements․ Avoid stretching the mat, as this could damage the components․ Once laid, inspect the mat for proper adhesion and a snug fit․ This step ensures the system operates efficiently and maintains even heat distribution throughout the floor․

Connecting the Ditra Heat Thermostat
Connect the Ditra Heat Thermostat to the power module, ensuring secure wiring and integration with the heating components․ Utilize smart features for remote control via smartphone apps, enhancing convenience and efficiency in managing your underfloor heating system․
Wiring the Thermostat to the Power Module
Connect the Ditra Heat Thermostat to the power module by following the wiring diagram provided in the manual․ Ensure the sensor wire, which is thinner than the heating cable, is securely connected and routed properly․ Jog the sensor wire every three studs to maintain proper spacing and avoid damage․ Double-check all connections for tightness and accuracy to prevent electrical issues․ Refer to the installation manual for specific wiring instructions tailored to your system configuration․ Proper wiring ensures seamless communication between the thermostat and the power module, enabling precise temperature control and efficient operation of your underfloor heating system․ Always follow safety guidelines to avoid electrical hazards during this process․
Integrating the Thermostat with Ditra Heat Components
Integrating the Ditra Heat thermostat with system components ensures seamless operation․ Connect the thermostat to compatible power modules, such as the Ditra-Heat-E-RR or Ditra-Heat-E-RRS, following the wiring diagram․ Ensure the sensor wire is properly routed and connected to avoid interference․ The thermostat communicates with the power module to regulate the heating system efficiently․ Always refer to the installation manual for specific integration steps tailored to your setup․ Proper integration ensures precise temperature control, optimal performance, and safety․ Double-check all connections to confirm compatibility and functionality․ This step is critical for achieving the desired heating results and ensuring long-term reliability of the Ditra Heat system․
Installing the Floor Temperature Sensor
Position the sensor in the center of the heated area, ensuring it’s securely fastened and not near heat sources to maintain accurate temperature readings․
Positioning the Sensor for Optimal Performance
Place the floor temperature sensor in the center of the heated area, away from direct heat sources like heating cables or pipes․ Ensure it is securely embedded in the adhesive layer of the Ditra mat, avoiding contact with the heating cable itself․ Proper positioning ensures accurate temperature readings and reliable system performance․ The sensor should not be near walls or corners to maintain even heat distribution․ If unsure about the optimal location, consult the installation manual or seek professional guidance for precise placement․
Connecting the Sensor to the Thermostat
Connect the floor temperature sensor to the Ditra Heat thermostat by matching the sensor wires to the designated terminals on the thermostat․ Ensure all connections are secure and tightly fastened to prevent signal interference․ Avoid over-tightening, which could damage the wires․ Once connected, verify that the thermostat recognizes the sensor by checking the display for temperature readings․ If the sensor is not detected, check the wiring connections and ensure there are no breaks or damage․ Proper connection is crucial for accurate temperature regulation and system functionality․ Refer to the installation manual for specific wiring diagrams and troubleshooting steps․

Testing the System
After installation, perform an initial power-on test to ensure the thermostat and sensor function correctly․ Check for LED indicators and verify the system responds to temperature adjustments smoothly and accurately․
Initial Power-On and System Check
Once all connections are secure, turn on the power supply to the Ditra Heat system․ Ensure the thermostat’s LED indicator lights up, signaling proper power connection․ Check the display for any error codes or messages․ Verify that the thermostat responds to button presses and touchscreen interactions․ Test the system’s basic functions, such as increasing or decreasing the set temperature․ Confirm that the heating elements activate and deactivate as commanded․ If the system fails to power on, review the wiring connections and ensure they match the installation manual’s specifications․ Additionally, check the circuit breaker or fuse box to confirm the power supply is functioning correctly․ This initial check ensures the system is operational before proceeding to more detailed testing․
Verifying Thermostat and Sensor Functionality
After powering on, ensure the thermostat communicates accurately with the floor temperature sensor․ Check the sensor’s placement, ensuring it is not in contact with the heating cable or mat․ Verify that the sensor reading displays correctly on the thermostat screen․ Test the system’s response by simulating a temperature change; the thermostat should adjust accordingly․ If the sensor reading appears inaccurate, refer to the installation manual for recalibration instructions․ Ensure the thermostat’s smart features, such as remote access, are functioning if applicable․ A proper connection between the thermostat and sensor is critical for maintaining consistent floor temperatures and energy efficiency․ Any discrepancies should be addressed promptly to avoid system malfunctions․ This step ensures the system operates smoothly and meets your heating requirements effectively․

Programming the Thermostat
Set daily schedules and preferred temperatures easily using the intuitive interface․ Utilize smart features for remote adjustments, ensuring energy efficiency and personalized comfort throughout the day․
Setting Up Daily Schedules and Temperature Preferences
To optimize energy efficiency and comfort, the Ditra Heat thermostat allows you to create customized daily schedules․ Use the touchscreen interface or smartphone app to set preferred temperatures for different times of the day․ Program wake, leave, return, and sleep periods to align with your lifestyle․ Adjust temperature settings for weekdays and weekends separately․ The thermostat also supports geofencing, automatically adjusting temperatures based on your location․ Additionally, you can set a maximum and minimum temperature to maintain consistent comfort levels․ These features ensure your heating system operates efficiently, reducing energy waste while keeping your space cozy․ Regularly review and update your settings to adapt to seasonal changes or personal preferences, ensuring long-term comfort and energy savings․
Using Smart Features for Remote Control
The Ditra Heat thermostat offers advanced smart features, enabling remote control through a smartphone app․ Compatible with both Android and iOS devices, this functionality allows users to adjust temperatures, view system status, and receive notifications from anywhere․ By creating a user account, you can access these features securely, ensuring convenient management of your heating system․ The app also supports geofencing, automatically adjusting temperatures based on your location, enhancing energy efficiency․ Additionally, voice control integration with smart home systems like Alexa or Google Assistant provides hands-free operation․ Regular software updates ensure the system remains up-to-date with the latest features and security enhancements, offering a seamless and modern heating control experience․ This remote accessibility not only adds convenience but also helps optimize energy usage and maintain consistent comfort levels in your home․
Maintenance and Troubleshooting
- Regularly inspect the thermostat and sensor connections for damage or corrosion․
- Check the floor temperature sensor placement for optimal performance․
- Reset the thermostat if issues arise, following the manual’s instructions․
Regular Maintenance Tips for the Ditra Heat System
Performing regular maintenance ensures the Ditra Heat system operates efficiently and safely․ Check the thermostat and sensor connections periodically to prevent corrosion or damage․ Insulate exposed wires and avoid moisture buildup near components․ Clean dust from vents and ensure proper airflow around the system․ Test the floor temperature sensor every six months to ensure accuracy․ Update thermostat software regularly for optimal performance․ Inspect the heating cables for signs of wear or damage․ Replace any faulty components promptly․ Schedule annual professional inspections to maintain warranty validity and system reliability․ Keep user manuals handy for quick troubleshooting․ By following these tips, you extend the system’s lifespan and maintain consistent heating performance․
Common Issues and Solutions
Common issues with the Ditra Heat system include inaccurate temperature readings, thermostat connectivity problems, and sensor malfunctions․ For inaccurate readings, ensure the sensor is properly positioned and not obstructed․ If the thermostat loses connection, restart the system or check network stability․ Sensor issues often arise from improper installation or damage; inspect wiring and connections․ If the system fails to heat, verify power supply and thermostat settings․ For remote access problems, ensure the thermostat is connected to Wi-Fi and update the app․ Regularly check for software updates to resolve connectivity issues․ If issues persist, consult the user manual or contact customer support․ Addressing these problems promptly ensures consistent performance and efficiency․
Completing the Ditra Heat thermostat installation ensures efficient and safe underfloor heating․ Perform final checks, verify all components, and enjoy optimal performance and energy efficiency in your space․
Final Checks Before Operation
Before activating your Ditra Heat system, conduct a thorough inspection to ensure all components are correctly installed and connected․ Verify that the thermostat is properly wired to the power module and that the floor temperature sensor is securely attached and positioned for accurate readings․ Check for any loose connections or damage to wires, which could lead to system malfunctions․ Test the thermostat’s functionality by switching it on and observing the LED indicators․ Ensure the system responds correctly to temperature adjustments and scheduling․ Review the installation manual to confirm all safety precautions and manufacturer recommendations have been followed․ Finally, perform a test cycle to ensure the heating mat activates and deactivates as programmed, providing consistent and even heat distribution across the floor․ This step is crucial for ensuring long-term efficiency, safety, and optimal performance of your underfloor heating system․
Ensuring Long-Term Efficiency and Safety
Regular maintenance is crucial for ensuring the Ditra Heat system operates efficiently and safely over time․ Start by inspecting all connections and wires for signs of wear or damage, addressing any issues promptly to prevent malfunctions․ Keep the system clean and free from debris, as buildup can reduce performance․ Always update the thermostat software to the latest version for optimal functionality and security․ Adhere to the manufacturer’s guidelines for load calculations and installation best practices to avoid overheating or uneven heat distribution․ Schedule annual professional inspections to ensure the system remains in good working condition․ By following these steps, you can enjoy consistent, reliable heating while maintaining energy efficiency and safety standards․